
新規プロジェクト (Delphi win32) を作成し、適当なフォルダに保存します。次に 「モデルビュー」 のタブをクリックします。

モデリングサポートを追加するかどうか尋ねてくるので、「はい」 を選びます。
モデリングサポートをすると、プロジェクトフォルダの下に 「ModelSupport_XXX」 と言うフォルダがつくられ、モデリング用のファイルが保存されます。

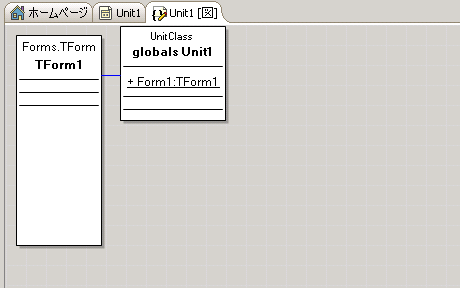
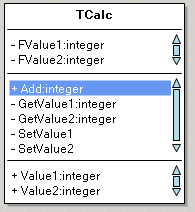
モデルビューの中の Unit1 をダブルクリックすると、以下のような Unit1 のクラス図が表示されます。
Form1 はとりあえずほっといて、以下のようなクラス図を書いてみましょう。
ありきたりですが、Value1と Value2のプロパティがあり、 Add メソッドを呼ぶと Value1 と Value2
を加算した結果を返すクラスです。
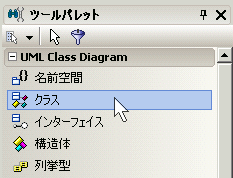
ツールパレットから 「クラス」 を選びます。
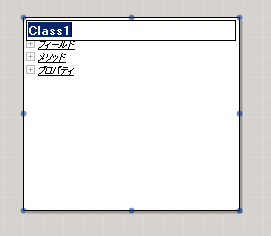
適当な場所にボタンなどを配置する時と同じように、ドラッグで四角を描きます。
すると Class1 と言う図形が表示されます。
クラス名はここでは 「TCalc」 とします。
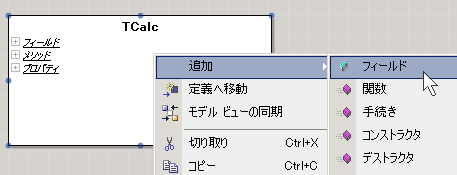
フィールドを追加してみます。
クラスを右クリックし、「追加」→「フィールド」を選びます。
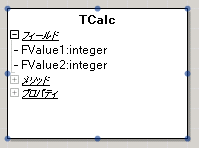
-FValue1: integer と入れてエンター、
もう1つ、-FValue2: integer と入れてエンターを押します。
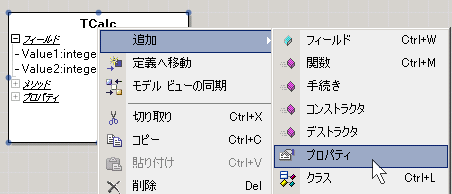
次にプロパティを追加します。
右クリックから 「追加」 → 「プロパティ」 を選びます。
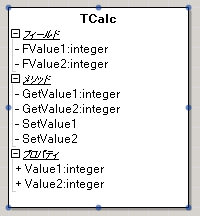
さっきと同じように、+Value1: integer、+Value2: integer、と入れます。
自動で GetValue、SetValue が追加されます。
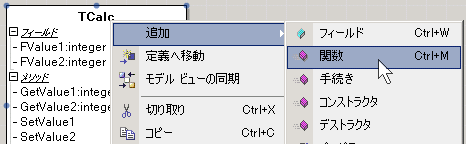
次に Calc メソッドを追加します。「追加」→「関数」 を選びます。
+Add: integer と入力します。
この状態で Unit1 のソースを確認すると・・・
|
■自動生成されたソースコード |
unit Unit1;
interface
uses
Windows, Messages, SysUtils, Variants, Classes, Graphics,
Controls, Forms, Dialogs;
type
TForm1 = class(TForm)
private
{ Private declarations }
public
{ Public declarations }
end;
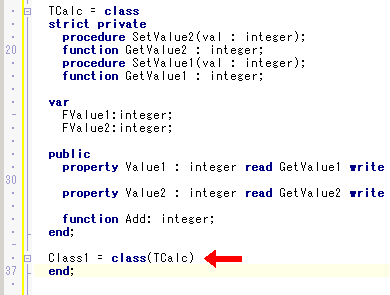
TCalc = class
strict private
procedure SetValue2(val : integer);
function GetValue2 : integer;
procedure SetValue1(val : integer);
function GetValue1 : integer;
var
FValue1:integer;
FValue2:integer;
public
property Value1 : integer read GetValue1 write SetValue1;
property Value2 : integer read GetValue2 write SetValue2;
function Add: integer;
end;
var
Form1: TForm1;
implementation
{$R *.dfm}
function TCalc.GetValue1: integer;
begin
end;
procedure TCalc.SetValue1(val : integer);
begin
end;
function TCalc.GetValue2: integer;
begin
end;
procedure TCalc.SetValue2(val : integer);
begin
end;
function TCalc.Add: integer;
begin
end;
end.
|
このように、クラス図からソースコードが出来ています。
GetValue1、2、SetValue1、2、 Add の内容を記述すると完成です。
せっかくなのでもう少し遊んでみます。
次は TCalc からの派生クラスを表現してみます。
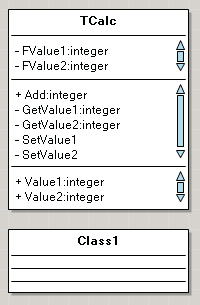
空のクラスを適当なところへつくります。
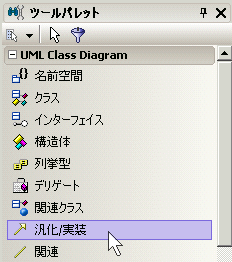
ツールパレットから 「汎化/実装」 を選びます。

Class1 上でクリックし、TCalc に向かってドラッグします。
言葉だと表現しにくいな、、。
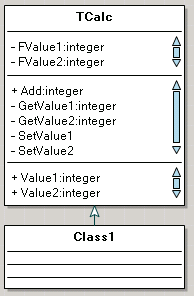
成功するとこのように矢印が表示されます。
ソースコード上もこのように、派生クラスとしてコードが出来上がっています。コード側にメソッドを追加するとモデルビュー側にも反映されます。
